နည္းပညာဗဟုသုတ ျပည့္၀ၾကပါေစ

Sunday, November 27, 2011

Networking (Basic)


မိုးလေ့လာထားသလောက်Networking အကြောင်း များကို အခြေခံမှစပြီ ဖြည်းဖြည်းချင်းရေးပြသွားပါ့မယ်။ ခုတော့ အခြေခံလေးစပြီးတော့ လေ့လာရအောင်နော်။
Networking ဆိုတာ Computer ကနေစခဲ့တာပါ။ ကမာ္ဘ့ပထမဆုံး Computer စပေါ်ချိန်တွင် network ဆိုတာမရှိသေးပါဘူး။ ဒုတိယမြောက် Computer ပေါ်လာချိန်တွင် File နဲ့ Folder တွေကို စက်တစ်လုံးနှင့်တစ်လုံး ရွှေ့ပြောင်းရာတွင် လူမလိုပဲ ရွှေ့ပြောင်းနိုင်ရန် အမျိုးမျိုး တီထွင်ခဲ့ကြပါတယ်။ ပထမတော့ Data များကို ရွှေ့ပြောင်းဖို့ Floppy and CD တို့ကို အသုံးပြုခဲ့ကြသည်။ ထိုကဲ့သို့ စက်တစ်လုံးမှတစ်လုံး ရွှေ့ပြောင်းသုံးနည်းကို Sneakernet ဟုခေါ်ဆိုခဲ့ကြသည်။ Sneakernet ၏အားနည်းချက်ကတော့ အချိန်ကုန်၊ လူပင်ပန်းခြင်းပင်ဖြစ်သည်။ ထိုအချိန်မှစပြီး network ကို စတင်တီထွင်ခဲ့ကြပါသည်။
network တစ်ခုကို သုံးပြီး အနည်းဆုံး Computer ၂ လုံး မှ ရာထောင်ချည်သော Computer များသို့ Dataများ၊ Printerများ၊ Driveများကို မျှဝေအသုံးပြုနိုင်ပါသည်။ တနည်းဆိုရလျှင် network ဆိုသည်မှာ Computer တစ်လုံးရှိ information များကို လူကိုယ်တိုင်သယ်ဆောင်ရန်မလိုဘဲ ထိုင်ရာမထ ယူသုံးနိုင်ခြင်းပင်ဖြစ်ပါသည်။

(1) Network အမျိုးအစား ဘယ်နှစ်မျိုးရှိလဲ?
Network အမျိုးအစားကို အခြေခံအားဖြင့် LAN, MAN, WAN ဆိုပြီး (၃) မျိုးခွဲခြားထားပါတယ်။

(a) LAN (Local Area Network)
LAN ကို အဆောက်အဦးတစ်ခုအတွင်း (သို့) ရုံးတစ်ရုံး အတွင်း ချိတ်ချက်အသုံးပြုနိုင်သည်။ အကွာ အဝေးအားဖြင့် ယခင်က Hub/ Switch မှ 185m (၆၀ဝ ပေ) နှင့် Computer အရေအတွက် (၃၀) ထိ သတ်မှတ်ထားပါသည်။ ယခုခေတ် နည်းပညာ ဖွံ့ဖြိုးတိုးတက်လာသည်နှင့်အညီ LAN အသုံးပြုနိုင်သည် အကွာ အဝေးနှင့် Computer အရေတွက် ပိုမို များပြားလာပါပြီ။
(b) MAN (Metropolitan Area Network)
MAN Network ကတော့ LAN ထက်ကြီးပြီး WAN ထက်တော့ ငယ်ပါတယ်။ တစ်နည်းဆိုရလျှင် LAN (၂)ခု သို့မဟုတ် (၂) ခုထက်ပိုပြီး ချိတ်ဆက်ထားခြင်းပင်ဖြစ်ပါသည်။ MAN ကို မြေပြင်ဧရိယာအကျယ်အဝန်းအားဖြင့် မြို့တစ်မြို့အတွင်း အသုံးပြုနိုင်ပါတယ်။ ယနေ့ခေတ်တွင် MAN ဆိုသော အခေါ်အဝေါ်သည် ပျောက်ကွယ်လုနီး ဖြစ်နေပါပြီ။
(c) WAN (Wide Area Network)
WAN Network ကတော့ LAN ပေါင်း များစွာကို ချိတ်ဆက်အသုံးပြုထားခြင်းဖြစ်ပါသည်။ အကွာအဝေး ဧရိယာ အကန့်အသတ်မရှိဘဲ မြို့တစ်မြို့မှ တစ်မြို့ ကမာ္ဘအနှံ့ဆက်သွယ်ထားသော ကွန်ယက်ကြီးတစ်ခုပင်ဖြစ်ပါတယ်။ LAN တစ်ခုနှင့်တစ်ခု ချိတ်ဆက်ရာတွင် Backbone (ပင်မဆက်ကြောင်း)အဖြစ် Radio link, Satellite Link, Fiber cable တို့ဖြင့်အသုံးပြုကြသည်။ မိုးတို့သုံးနေတဲ့ internet ဆိုတာ WAN ဆိုသော ကမာ္ဘ့အကြီးဆုံး Network ကြီးကို ဆိုလိုခြင်းပါ။ ဒါကြောင့်လူတွေက Internetကိုသုုံးပြီး ကမာ္ဘကြီးကို ရွာကြီးတစ်ရွာသဖွယ်အသုံးပြုလာနိုင် ကြပြီလေ။


ဗဟုသုတတိုးပွားနိုင်ကြပါစေလို့ဆုတောင်းရင်း...
မိုး

Rate this posting:
{[['']]}

Thursday, November 24, 2011

Facebook တွင် emotion symbols ထည့်နည်း

မိတ်ဆွေတစ်ယောက်က မေးလို့ အားလုံးအတွက်ရည်စူးပြီး မိုးဆိုဒ်လေးမှာ တင်ပေးလိုက်တယ်နော်။

ဒါလေးကိုနှိပ်လိုက်နော်

Application ကို Run လိုက်ပါ။

ကဲအခုတော့ emotion လေးနဲ့ chat လို့ရပြီပေါ့။

အောက်မှာ emotion symbols လေးတွေကိုပါ ရှာပေးထားတယ်နော်။


FaceBook Chat Emoticons
Emoticons Shortcut Key Description
like thump up facebook chat emoticons (y) (Y) Like / Thumb Up Facebook Chat Emoticons NEW!!
42 red facebook chat emoticon :42: 42 Red Number FaceBook Chat Emoticon
facebook chat emoticon angel O:) O:-) Angel FaceBook Chat Emoticon
facebook chat emoticon confused o.O O.o Confused FaceBook Chat Emoticon
facebook chat emoticon cry :'( Cry / Tears Eye FaceBook Chat Emoticon
facebook chat emoticon curly lips :3 Curly Lips Facebook Emoticon / cute / cat-like
facebook chat emoticon devil 3:) 3:-) Devil / Satan / Vampire FaceBook Chat Emoticon
facebook chat emoticon frown :-( :( :[ =( Frown / Sad FaceBook Chat Emoticon
Facebook Chat Emoticon Gasp :-O :O :-o :o Gasp / Surprise FaceBook Chat Emoticon
facebook chat emoticon glasses 8-) 8) B-) B) Glasses / Blue Glasses FaceBook Chat Emoticon
facebook chat emoticon grin :-D :D =D Grin Facebook Chat Emoticon (Big Smile)
facebook chat emoticon grumpy >:( >:-( Grumpy FaceBook Chat Emoticon
facebook chat emoticon heart <3 Heart / Love FaceBook Chat Emoticon
facebook chat emoticon kiki ^_^ Kiki FaceBook Chat Emoticon
facebook chat emoticon kiss :-* :* Kiss Facebook Chat Emoticon
facebook chat emoticon pacman :v Pacman Facebook Chat Emoticon
facebook chat emoticon penguin <(") Penguin Facebook Chat Emoticon
facebook chat emoticon chris putnam :putnam: Putnam (Chris Putnam) Facebook Chat Emoticon
facebook chat emoticon robot :|] Robot Facebook Chat Emoticon
facebook chat emoticon shark (^^^) Shark FaceBook Chat Emoticon
facebook chat emoticon smile :-) :) :] =) Smile Facebook Chat Emoticon
facebook chat emoticon squint -_- Squint FaceBook Chat Emoticon
facebook chat emoticon sun glasses 8-| 8| B-| B| Sun / Black Glasses FaceBook Chat Emoticon
facebook chat emoticon tongue :-P :P :-p :p =P Tongue FaceBook Chat Emoticon
facebook chat emoticon unsure :/ :-/ : :- Unsure Facebook Chat Emoticon
facebook chat emoticon upset >:O >:-O >:o >:-o Upset FaceBook Chat Emoticon
facebook chat emoticon wink ;-) ;) Wink FaceBook Chat Emoticon

အားလုံးပဲ ပျော်ရွှင်ကြပါစေ။

မိုး
Rate this posting:
{[['']]}

Friday, November 18, 2011

မှတ်သားစရာ စကားလေးတွေပါ

မိုးငယ်စဉ်ကတည်းကလေ့လာမှတ်သားခဲ့တဲ့ စကားပုံလေးတွေပါ။ မိုးအရမ်းကြိုက်သလို လိုက်လဲလိုက်နာသင့်တာမို့ မိတ်ဆွေတို့ကို ပြန်လည်မျှဝေခြင်းပါ။

1. The insincere will get no sincere in return.
မရိုးဖြောင့်သည့်ဒဏ် ကိုယ်သာပြန်ခံ။

2. No matter how big the problem is, it can be solved with wise thinking.
မည်မျှကြီးမားသည့် ပြဿနာဖြစ်နေပါစေ။ ချင့်ချိန်တိုင်းထွာတတ်သော ဉာဏ်ပညာဖြင့် ဖြေရှင်းနိုင်သည်။

3. Wisdom is better than beauty.
ဉာဏ်ပညာဟူသည် လှပတင့်တယ်ခြင်းထက် သာလွန် ကောင်းမွန်သည်။

4. Forceful manner cannot always influence people.
ခွန်အားသက်သက်ဖြင့် အရာရာတိုင်းကို မအောင်မြင်နိုင်ပါ။

5. Anyone who has bad intention will always suffer bad results.
မကောင်းကြံစည်သူသည် ဒုက္ခဆိုးကျိုးများဖြင့်သာ ဆုံးခန်းတိုင်ရလိမ့်မည်။

6. Are you trying real hard? (John Harold Johnson)
သင်တကယ်ကြိုးစားနေတာလား
တကယ်ကြိုးစားနေရင် မအောင်မြင်စရာမရှိဘူး။ အောင်မြင်လိမ့်မယ်။ မကြိုးစားတော့ဘူးဆိုမှသာ တကယ်ရှုံးသွားမည်။

7. ငိုမနေနဲ့ပြီသွားလိမ့်မယ်၊ ကြွားမနေနဲ့ ပြီးသွားလိမ့်မယ်၊ ဆင်းရဲတာရော ချမ်းသာတာရော အမြဲမဟုတ်ဘူး တစ်ချိန်ကျရင် ပြီးသွားလိမ့်မယ်။ (ဒါကတော့ မိုးအကြိုက်ဆုံးပါပဲ)

8. ပညာရေးမှာ လူတန်းစား ကွဲပြားမှုမရှိ။ (ကွန်ဖြူးရှပ်)


လေ့လာမှတ်သားရင်း လိုက်နာနိုင်ကြပါစေ

မိုး Rate this posting:
{[['']]}

Wednesday, November 9, 2011

Facebook အသုံးပြုနည်း (အခြေခံ)


Facebook ရဲ့ အသုံးဝင်ပုံ

- Facebook မှ ကွဲကွာသွားသွား မိသားစုများ၊ သူငယ်ချင်းများကို ပြန်လည်တွေ့ရှိနိုင်ခြင်း

- ဓါတ်ပုံများ၊ ဗီဒီယိုများ၊ သီချင်း များနှင့် သတင်းများကို Share လုပ်ပေးနိုင်ခြင်း

Facebook အသုံးပြုနည်း

အဆင့် (၁) - Signup

အဆင့် (၂) – Find Friends

အဆင့် (၃) – Profile Information

အဆင့် (၄) – Upload Photo in Profile

အဆင့် (၅) – Upload Photo with Album

အဆင့် (၆) – Friends add

အဆင့် (၇) – Upload photo with Album

အဆင့် (၈) – How to use Facebook

အဆင့် (၉) – Post in your Wall

အဆင့် (၁၀) – Chat with friends

အဆင့် (၁၁) - Sign out

အဆင့် (၁၁) – Sign in

Signup
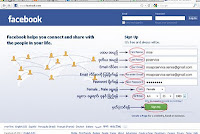
ပုံ (၁)

- First name, Last name, Password တို့ကို နှစ်သက်ရာပေးနိုင်သည်။

- Email address တွင် မိမိ၏ Email address ကိုသာထည့်ရမည်။ (မှတ်ချက်) Email တစ်ခုကို Facebook

account တစ်ခုသာ ပြုလုပ်နိုင်သည်။

- ပုံ (၁) တွင်ပြထားသည့်အတိုင်း အဆင့်ဆင့်ဖြည့်ပေးပြီး Sign Up ကိုနှိပ်ပါ။
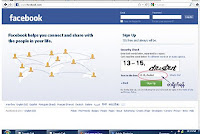
ပုံ (၂)

- ပုံ(၂) တွင်ပြထားသည့်အတိုင်း Security Check အောက်ရှိ ပေးထားသော စာသားကို Text in the box

တွင်မှန်ကန်အောင်ဖြည့်ပါ။

- ပြီးလျှင် Sign Up ကိုနှိပ်ပြီး ခဏစောင့်ပါ။

- ပြီးလျှင် မိမိရဲ့ E-mail ကိုဖွင့်ပြီး Facebook မှ ပို့ထားသော http://www.facebook.com..... ဆိုသော Link

ကိုနှိပ်ပြီး Confirm ပြန်လုပ်ပေးပါ။

- ဒါကတော့ Sign Up (မှတ်ပုံတင်ခြင်း) အဆင့်ကို ပြီးမြောက်သွားပါပြီ။

Find Friends (သူငယ်ချင်းရှာန်ရန်)
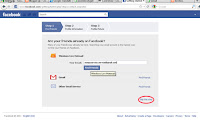
ပုံ (၃)

- ပုံ (၃) တွင်ပြထားသည့်အတိုင်း မိမိကျောင်းတက်စဉ်သူငယ်ချင်းများ၊ အလုပ်ထဲရှိသူငယ်ချင်းများကို add

လုပ်ရမည်။ ဥပမာ - No.(1) Basic Education High School Hpa-an Form ဖြည့်စဉ်ရေးထားလျှင် မိမိ

ကျောင်းရှိ သူငယ်ချင်းများကို ဖော်ပြပေးမည်ဖြစ်သည်။

- အဲ ဒီကနေသူငယ်ချင်းမရှာချင်ဘူးဆိုရင်တော့ Skip this step ဖြင့် ကျော်လိုက်ပါ။

Profile Information
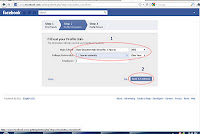
ပုံ (၄)

- ကဲ ဒါကတော့ အကောင့်ပိုင်ရှင်ရဲ့ Profile လေးပါ။

- ဒီနေရာမှာ မှန်ကန်စွာဖြည့်မ ယ်ဆိုရင် မိမိရဲ့ ကျောင်းတုန်းကသူငယ်ချင်းတွေကို အမြန်ဆုံး ပြန်ရှာတွေ့နိုင်

ပြီပေါ့။

- ပုံ (၄)မှာ ပြထားတဲ့အတိုင်း မိမိကျောင်းနာမည်၊ အလုပ်နာမည်ကို ဖြည့်ပေးပါ။

- ဒီအဆင့်ကိုကျော်ချင်ရင် Skip ကိုနှိပ်ပြီးကျော်နိုင်ပါတယ်။

Upload Photo in Profile
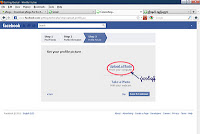
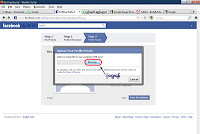
ပုံ (၅)

- ဒါကတော့ မိမိအကောင့်တွင်ပုံတင်ခြင်းပါ။

- Upload a Photo ကို Click တစ်ချက်နှိပ်ပါ။

- ကျော်သွားချင်ရင်တော့ ထုံးစံအတိုင်း Skip ကိုနှိပ်ပြီး ကျော်လိုက်ပေါ့

- မိုးကတော့ပုံတင်လိုက်အုံးမယ်နော်...

ပုံ (၆)

- Browse ကို click တစ်ချက်နှိပ်ပြီး မိမိပုံရှိရာနေရာကို အဆင့်ဆင့်သွားပါ။

- ပြီးလျှင် ပုံကိုရွေးပြီး open ကိုနှိပ်ပါ။

- စက္ကန့်အနည်းငယ်အတွင်း ပုံတက်လာလိမ့်မည်။ ပုံ (၇) ကိုကြည့်ပါ။
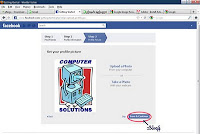
ပုံ (၇)

- ပုံတက်လာလျှင် Save & Continue နှိပ်လိုက်ပါ။


Friends add (သူငယ်ချင်းဖိတ်ရန်)
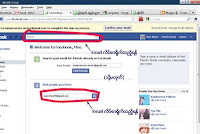


ပုံ (၈)

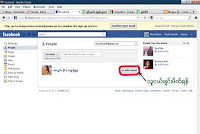
- ပုံ (၈) တွင် ပြထားသည့် Search Box တွင် မိမိသူငယ်ချင်း၏ email address (သို့မဟုတ်) facebook

account နာမည်ကိုရိုက်ပြီး enter နှိပ်ပါ။

- သူငယ်ချင်း account ပေါ်လာလျှင် add friend ကိုနှိပ်ပါ။

- နောက်တစ်ခုက ညာဘက်တွင်ပေါ်နေသော မိတ်ဆွေများကိုလဲ Add friend ကိုနှိပ်ပြီး သူငယ်ချင်းအဖြစ်

မိတ်ဖွဲ့နို်င်သေးတယ်နော်။


Upload Photo with Album
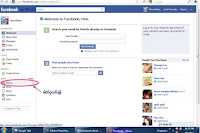
ပုံ(၉)

- ကဲ ကိုယ့်ရဲ့ facebook လေးမှာ ဓါတ်ပုံလေးတွေ တင်ရအောင်နော်။

- ပထမဆုံး album လေးတစ်ခု အရင် တည်ဆောက်ကြမယ်နော်။

- ပုံ (၉)တွင် ဝိုင်းပြထားသော Photos ကို clickတစ်ချက်နှိပ်ပါ။

-Upload Photos ကို click တစ်ချက်နှိပ်ပါ။


- ပြီးရင်တော့ ပုံ (၁၀) မှာ ပြထားတဲ့အတိုင်း album လေးဆောက်ကြတာေပါ့။
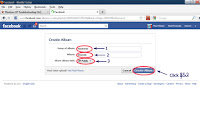
ပုံ (၁၀)

- 1 = Album name (album အမည်)

2 = Where (ဓါတ်ပုံယူရာနေရာ) eg: my computer

3 = Share album with (Public, Friends, Custom ကြိုက်ရာရွေးနိုင်သည်။)

- ကဲပြီးရင်တော့ Create Album လေးကိုနှိပ်လိုက်ပေါ့။

- ဒါဆို Album လေး တစ်ခုတည်ဆောက်ပြီးပြီလေ။
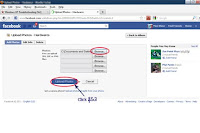
ပုံ (၁၁)

- Album ဆောက်ပြီးပြီဆိုတော့ ပုံလေးတွေစတင်လို့ရပြီနော်။

- Browse ကိုနှိပ်ပြီး ပုံလေးတွေရွေးရအောင်နော်။ တစ်ခါတင်ရင် (၅)ပုံအထိ တင်လို့ရတယ်။

- ပြီးသွားရင်တော့ Upload Photos လေးကိုနှိပ် ပြီးခဏစောင့်လိုက်ရင် ကိုယ့်ရဲ့facebook လေးမှာ ပုံလေး

တွေနဲ့ လှသွားပြီပေါ့။

- connection မကောင်းရင်တော့ သိတဲ့အတိုင်းပဲ နည်းနည်းကြာမယ်နော်။

- မိုးကတော့မစောင့်နိုင်လို့ ၁ပုံပဲတင်လိုက်တယ်။
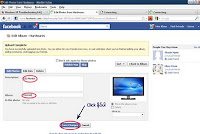
ပုံ (၁၂)

- Description နေရာမှာ ပုံနဲ့ပတ်သက်တာရေးပေါ့။

Wheres မှာကတော့ ထုံးစံအတိုင်း တစ်ခုခုရေးလိုက်ပါ။ (ဥပမာ- my computer)

- ပြီးရင် Save Changes ကိုနှိပ်ပါ။

- Publish , Skip, Cancle ပေါ်လာလျှင် Publish ကိုရွေးလိုက်ပါ။


How to use Facebook
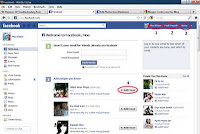
ပုံ (၁၃)

- facebook စာမျက်နှာလေးကိုလေ့လာကြည့်ရအောင်နော်။

1 = Moe Khine (ဒါကတော့ မိမိပိုင်နေရာလေးပါ၊ ဒီနေရာမှာ မိမိအကြောင်း၊ တင်ထားသော ပုံများ၊ စာများ

ရှိရာနေရာလေးပါ။

မှတ်ချက်။ ။နောက်ဆုံးတင်ထားသော post များကိုသာတွေ့ရမည်။

2 = Find Friends (ဒါကတော့ email မှတဆင့် သူငယ်ချင်းရှာရန်)

3 = Home (ဒါကတော့ မိမိရော သူငယ်ချင်းများပါ တင်ထားသော သီချင်း၊ ဓါတ်ပုံ၊ စာသားများ အားလုံးကို

တွေ့နိုင်ပါတယ်) မှတ်ချက်။ ။နောက်ဆုံးတင်ထားသော post များကိုသာတွေ့ရမည်။

4 = ဒါကတော့ မိမိနေထိုင်ရာမြို့မှ (သို့) မိမိသူငယ်ချင်းများ၏ သူငယ်ချင်းကို ကို ဖိတ်ခေါ်ရန်ပါ။

ဖိတ်မယ်ဆိုရင် Add Friend ကို နှိပ်လိုက်ပါ။


Post in your Wall (မိမိစာမျက်နှာတွင် စာတင်ရန်)
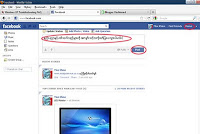

ပုံ (၁၄)

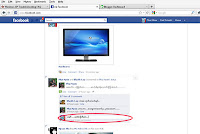
- Home ထဲမှာစာတင်ရအောင်။

- ပထမဆုံး ဝိုင်းပြထားသောနေရာတွင် စာရေးပါ။

- ပြီးလျှင် Post ကို နှိပ်ပြီး Enter နှိပ်ပါ။


Chat with Friends (သူငယ်ချင်းတွေနဲ့စကားပြောကြမယ်)
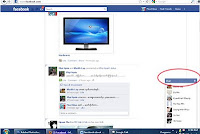


ပုံ (၁၅)


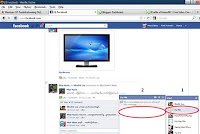
- 1 = Chat (ဒါကတော့ သူငယ်ချင်းတွေနဲ့ ချက်ဖို့နေရာပါ)

ကိုယ်ချက်ချင်သောသူကို click တစ်ချက်နှိပ်ပြီး

- 2 မှာတော့ စကားပြောဖို့နေရာလေးပါ။


Sign out
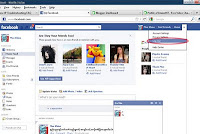

ပုံ (၁၆)

- ကဲ Facebook ကနေပြန်ထွက်မယ်ဆိုရင် တော့ အပေါ်မှာပြထားတဲ့ Sign out ကိုနှိပ်ပြီးထွက်လိုက်ရုံပေါ့။

Sign in

ပုံ (၁၇)

- ကဲ နောက်ဆုံး facebook ကို ဘယ်ကနေစဝင်မလဲ?

Email - တွင် facebook account ပြုလုပ်စဉ်က ဝင်ခဲ့သော Email ကိုဖြည့်ပါ။

2. Password - တွင့် facebook account ပြုလုပ်စဉ်က password ကိုဖြည့်ပါ။

3. Log In နှိပ်ပါ။ (သို့မဟုတ်) Enter ကိုနှိပ်ပါ။

ကဲဒီလောက်နဲ့အဆုံးသတ်ရအောင်နော်။ မိုးရေးထားတာတွေကို နားမလည်ခဲ့လျှင် moepcservice.service@gmail.com ကို ဆက်သွယ်မေးမြန်းနိုင်ပါတယ်။

“နောင်အချိန်ရရင်တော့ Facebook ရဲ့လျှို့ဝှက်ချက်လေးတွေကို ရေးပေးပါအုံးမယ်နော်”

လေးစားစွာဖြင့်

မိုး

Rate this posting:
{[['']]}

Tuesday, November 8, 2011

Gmail Account Lock ကျဖြည်နည်း


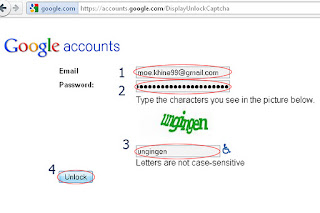
Gmail Account Lock ကျခဲ့လျှင် Unlock လုပ်နည်းလေးပါ။ ပထမဆုံး လင့်လေးကို click   နှိပ်ပါ။ ပြီးရင်တော့ အောက်မှာပေးထားတဲ့အတိုင်း ဖြည့်ပါ။
1 = Email address ကိုမှန်ကန်စွာရိုက်ပါ။
2 = Password ကို လည်းမှန်ကန်စွာရိုက်ပါ။
3 = ပေးထားသော စာကို မှန်ကန်စွာဖြည့်ပါ။
4 = Unlock လေးကိုနှိပ်လိုက်ပါ။
ပြီးရင် အကောင့်လေး Lock ကျတာပြေသွားပြီပေါ့။

လေးစားစွာဖြင့်
မိုး
Rate this posting:
{[['']]}

Saturday, November 5, 2011

Corel Draw - Lesson (1)

simple web layout design


Tutorial Details

  • Program: CorelDraw 11 - X5
  • Difficulty: All
  • Estimated Completion Time: 30 Minutes

Step 1 : Basic Elements

First of all you have to use CorelDraw with version 11+. In this tutorial I use CorelDraw X5, Okay lets get started. Let’s take a look at the basic elements used to create our design :

simple web layout design tutorial

This also will be our steps to create the design.


Step 2 : Creating Worksheet

Okay, now that you know the steps and elements, we will begin, first of all open your CorelDraw program, now create a new file and set the paper size to Custom and resize it to 30 x 19 cm.


Step 3 : Creating the Web Background

Now that we have our worksheet set, now we will begin to create the Web Background, first go to the " Rectangle Tool ", you can found it on the left toolbar, make a Box shape and resized it same as our worksheet ( 30 x 19 cm ).

Lets put color on the Biggest circle, by going to the " Fountain Fill tool " in the left toolbar and apply the value below, you can create a custom color by double click on the color box.

Create another copy of Circle shape and make it smaller than the original.

Now create another box shape with " Rectangle Tool " and apply the value below.

Make the corner rounded by go to the " Shape Tool " in the left toolbar, click and drag the corner to make it rounded.

Arrange the shape on top of the Background.


Step 4 : Working With Transparency

We are going to make the box shape transparent by go to the " Interactive Transparency Tool " in the left toolbar, now go to the upper toolbar and set the transparency type into uniform.

Copy the Box shape into the bottom of the Background.


Step 5 : Working With Powerclip

Okay now we are going to insert the Box Shape into the Background , select the Box Shape and go to the upper toolbar and find Effect > PowerClip > Place Inside the container, then you will see a black arrow, Left-click it to the Background, and now you will see that the Box Shape is inside the Background.

After that create a custom box shape with " Bezier Tool ", make sure the first click is connected to the last click or else you cant put color in it.

Now go to the " Shape Tool ", right click on the upper middle of the custom box shape and find " Convert to Curves " in the upper toolbar.

Now you see that theres an arrow in the corner of the custom box shape, click and drag in order to shape it, shape similar like below.

Put red color in it, then flip and copy the shape by pressing " Left + Right mouse " while hold and drag it to the opposite side.

Using same way as steps 5 select both of the shape and make it transparent.

Group the shape by selecting both of them and press " Ctrl + G " after that flip and copy the shape.

Now insert the shape into the background using " PowerClip " same as step 5.


Step 6 : Adding Circular Texture

Okay now we are going to add a circular texture into the background, go to the " Ellipse Tool " and create a small Circle shape.

Now copy the circle into the right side, make as many circle as you like.

After that copy it again, but this time copy it to the bottom of the original.

Now create a Circle on top of the Texture.

After that go to the upper toolbar and find Effect > Lens, after that set the lens type into fish eye and apply the value below.

After that select the texture and insert it into the Circle shape using " PowerClip " put red color in it.

Make it transparent using " Interactive Transparency Tool " and apply the value below.

Copy the Circle and arrange it on top of the Background.

Put the Circle inside the Background using " PowerClip ".

After that create another Circle using " Ellipse Tool ", put it anywhere outside the Background.

Now go to the " Interactive Shadow Tool " and drag it to the top of the Background select a white color for the shadow and appy the value below.

Break the shadow by pressing " Ctrl + K " this will make the shadow separate from the circle, and copy it into the bottom of the Background.

Put the shadow inside the Background using " PowerClip ".

Okay now create another Box shape using " Rectangle Tool " and apply the value below.

Create another box shape and arrange it on top of the previous one.

Make the corner rounded using " Shape Tool ".

Now select both of the box shape, and go to the upper toolbar find " Weld Tool " and press it.

This will make both of the shape combine, after that put red color in it.

Arrange it on top of the Background, and make it transparent using " Transparency Tool ".

Flip and copy the shape and arrange it on the bottom of the Background.


Step 7 : Creating The Navigation Bar

We are going to create the navigation bar, create a thin box shape using " Rectangle Tool " and apply the value below.

Make the corner rounded using " Shape Tool ".

After that go to the " Interactive Contour Tool " in the left toolbar and apply the value below to create an outline.

Lets put color on the navigation bar by go to the " Fountain Fill Tool " and apply the value below.

Put red color on the outline.

Arrange the Navigation Bar on top of the Background similar like below.

Select the Outline and make it transparent using " Interactive Transparency Tool " and apply the value below.

Create a box in the Navigation Bar to make a highlight button using " Rectangle Tool " and apply the value below.

Make the corner rounded using " Shape Tool " and apply the value below.

Create an outline of the button using " Interactive Contour Tool ".

Put color on the button by go to the " Fountain Fill Tool " and apply the value below.

Put red color on the outline and make it transparent using " Interactive Transparency Tool ".

Using same steps as above create a search box on the Right side of the Navigation Bar.

Create a thin line using " Bezier Tool " to create a button separation.


Step 8 : Creating the Contents Bar

Now we are going to create the content bar, go to the " Rectangle Tool " create a box shape and apply the value below.

Make an outline by go to the " Interactive Contour Tool " and apply the value below.

Put color in the content bar by go to the " Fountain Fill Tool " in the left toolbar and apply the value below.

After that arrange it on top of the Background.

Put red color on the outline and make it transparent using " Interactive Transparency Tool ".

Copy the flow elements on the Background and put black color in it.

Arrange it on top of the Contents Bar.

Put it inside the Content bar using " PowerClip ".

Now select the button in the Navigation Bar and copy it, after that arrange it on the left and right side of the Contents Bar.

Create an arrow shape using Bezier tool on top of the copied button.

Now create another box shape by go to the " Rectangle Tool " and apply the value below.

Create an outline by go to the " Interactive Contour Tool " and apply the value below.

Put color on the Box shape by go to the " Fountain Fill Tool " and apply the value below.

Arrange it on the bottom of the Contents Bar.

Put red color on the outline and make it transparent using " Interactive Transparency Tool ".

After that copy again the Flow element on the background.

Arrange it on top of the Shape that you previously create.

Put it inside the shape using " PowerClip " .


Final Image

And we are done, you can customize it by adding more color, text, shadow or texture like the final image below.

simple web layout design


ကဲ ဒါကတော့ Corel Draw သုံးပြီး Web Layout Design ဆွဲထားတဲ့ သင်ခန်းစာလေးပါ။ မိုးလေ့လာရင်း အများလဲ လေ့လာလို့ရအောင် တင်ပေးလိုက်တာပါ။
မိုး


Rate this posting:
{[['']]}

Twitter Facebook More